Introduction
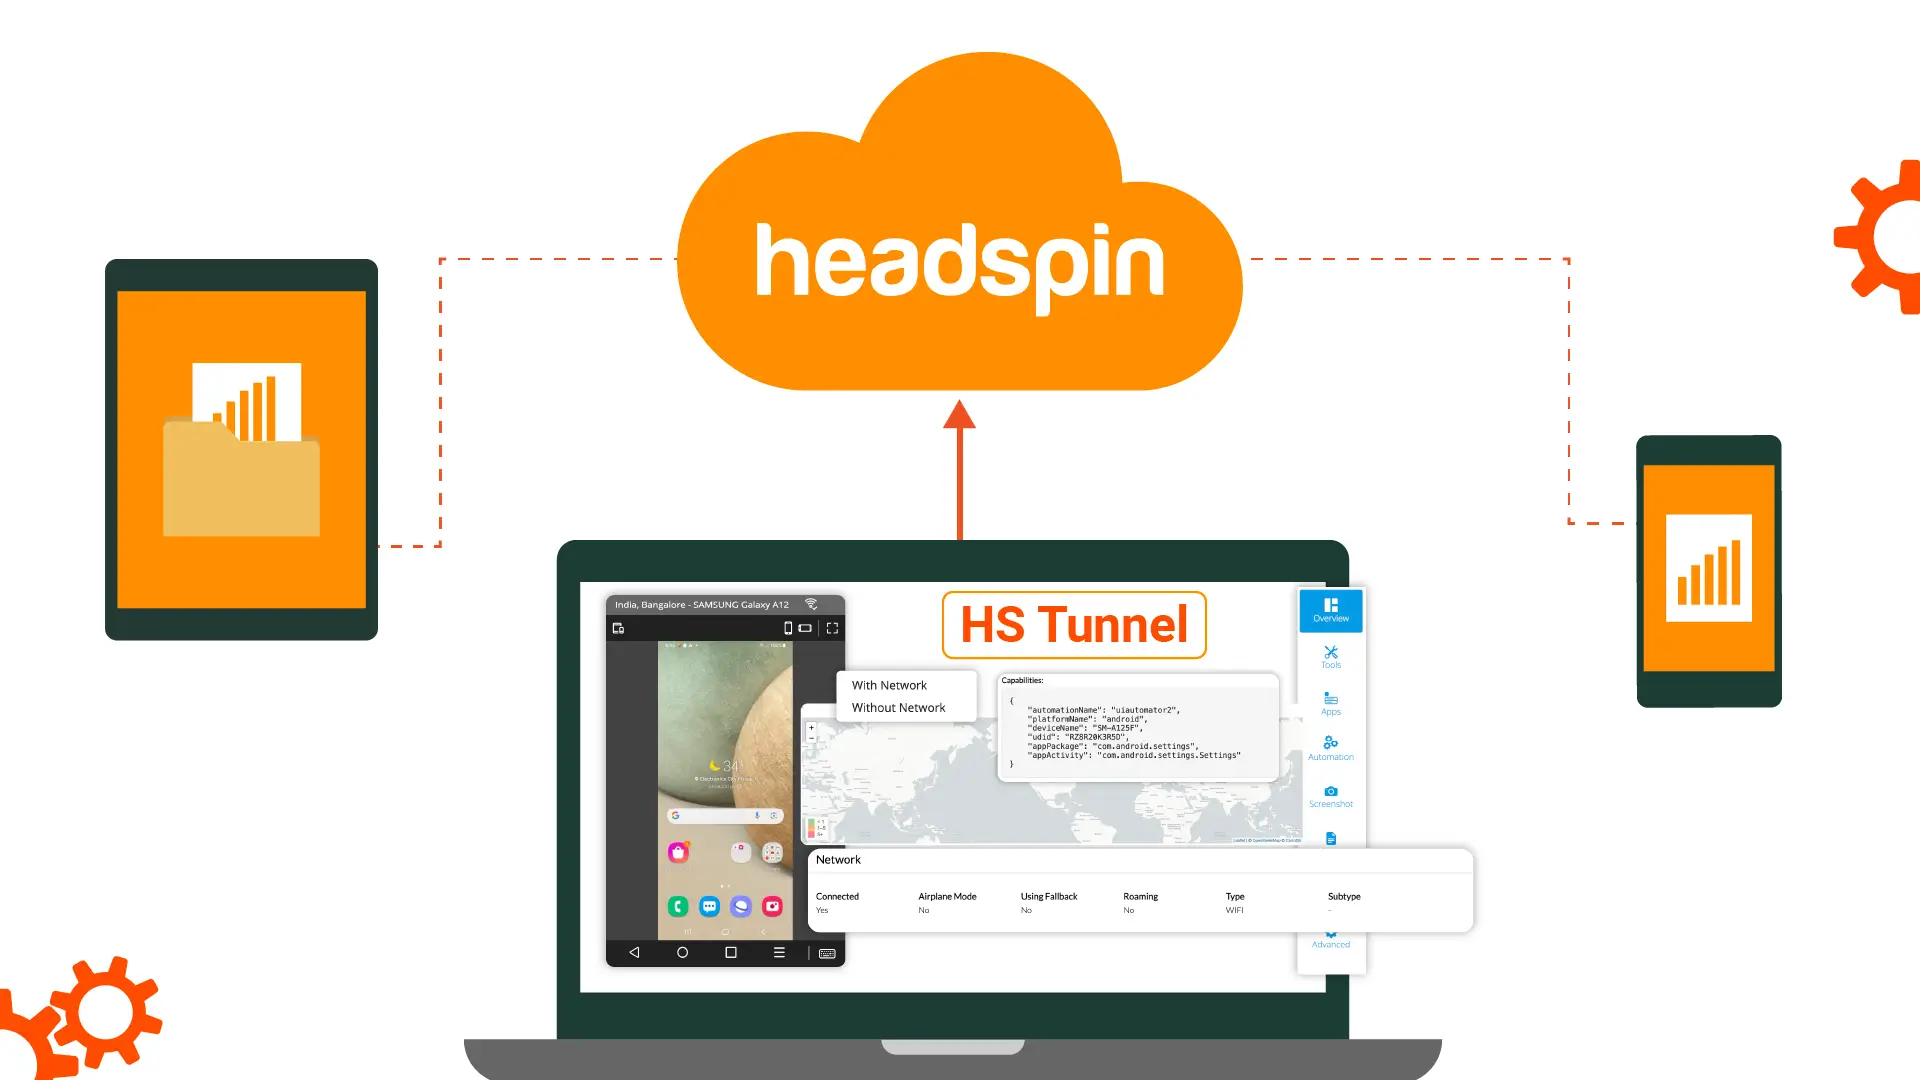
HeadSpin's introduced a groundbreaking feature called the HS Tunnel. This feature enables secure connections between HeadSpin devices and local or staging environments, benefiting organizations, teams, and individual users.
This blog post dives into the HS Tunnel, exploring its features and providing easy-to-follow instructions for seamless usage.
Understanding HS Tunnel: What You Need to Know
The HS Tunnel feature in HeadSpin facilitates routing network traffic from remote HeadSpin devices through your local network. This tool opens up the possibility of accessing intranet services and other resources to test a device within the local network directly from your HeadSpin devices.
Common scenarios where users leverage this tool include:
- Testing applications with intranet resources
- Trying out non-public versions of apps
- Configuring ad-hoc regional routing to test devices within network locations
With HS Tunnel, you can seamlessly integrate your testing environment with your local network resources, enhancing your testing capabilities effortlessly.
Unlocking the Functionality of HeadSpin Tunnel
- Connecting Remote Devices to Client Networks: When a client requires the remote device to be on the same network, HeadSpin Tunnel comes to the rescue. For instance, when a test application operates solely within a client's intranet or requires access to data on a company network, the tunnel enables the remote device to join the client's network where the Command Line Interface (CLI) is running.
- Installation and Setup: Clients can install the CLI on any server or laptop connected to their network. This allows routing network traffic from remote devices and access to the same network seamlessly, bridging the gap between testing environments and client networks effortlessly.
- Network Log Capture: HeadSpin Tunnel extends its functionality to capturing network logs using tools like Charles. When the remote test device must be on the same network as the device running Charles, the tunnel facilitates this connection, enabling efficient network log analysis and debugging.
- Accessing Hosted Servers: Another valuable use case is accessing servers hosted on specific machines. Clients can efficiently connect their remote devices to the network and access the desired server instance by providing the IP address of the hosting machine and utilizing the tunnel.
HeadSpin Tunnel offers versatile solutions for integrating remote testing environments with client networks, ensuring seamless testing experiences and enhanced collaboration.
Read: How to Leverage the HeadSpin REST APIs in Your Appium Script
Using HS Tunnel: Key Information
- Command Usage: To utilize the HeadSpin Tunnel tool, use the main command hs tunnel via the HeadSpin Command Line Interface (CLI). Ensure you have the latest CLI version available for download on the User Settings page under 'Downloads' for optimal performance.
- Pre-requisites: HeadSpin Tunnel is designed for sessions capturing network data. Therefore, the network data should be captured before using the HS tunnel tool. Ensure your organization's permissions are correctly configured, particularly the tunnel_feature org permission. To learn more about configuring networks outside of a capture session, please refer to our documentation on network shaping, which is available here.
- Configuration Options: The HS Tunnel tool offers flexibility with multiple upstream routes for raw traffic and DNS resolution. Configure these routes using the --proxy and --dns options, along with rules evaluated using --proxy-rule and --dns-rule. Define the scope of access using the --scope option, ranging from user to organization level.
- Priority of Usage: Properly configured HS Tunnel to automatically route network traffic remotely during network capture. Routes are prioritized in descending order: user-scoped, team-scoped, and org-scoped tunnels. Multiple tunnels can coexist for redundancy or to serve different network portions.
- Team and Org Configurations: Teams or organizations can set up tunnels for collective use, streamlining access without individual configuration. Utilize the -scope flag to achieve this. Refer to the documentation for further details on available flags.
- Limitations: Currently, HS Tunnel has limited compatibility with browsers, as DNS requests are not routed through tunnels. Testing networking services via HS Tunnel in browsers may require public DNS. Additionally, ensure compatibility with network environments using proxies or firewalls, as additional steps may be necessary to ensure correct functionality within your network's security parameters.
Prerequisites: Installing the HS CLI Tool
To start using the HS Tunnel, you must install the HS CLI tool, which is available for MAC, Linux, and Windows. Follow these steps to download and install the tool:
1. Accessing Settings: Click on your name and Org name at the top right corner of the UI.
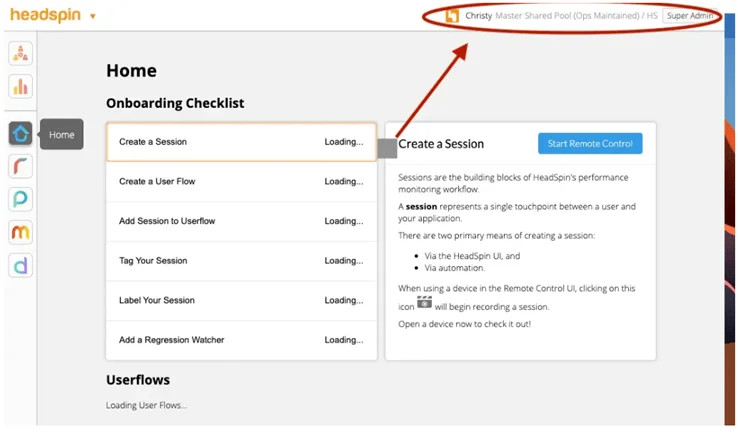
2. Navigating to Settings: From the drop-down menu, select "Settings."

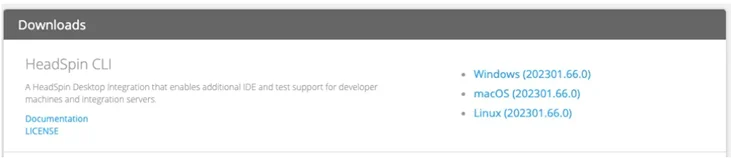
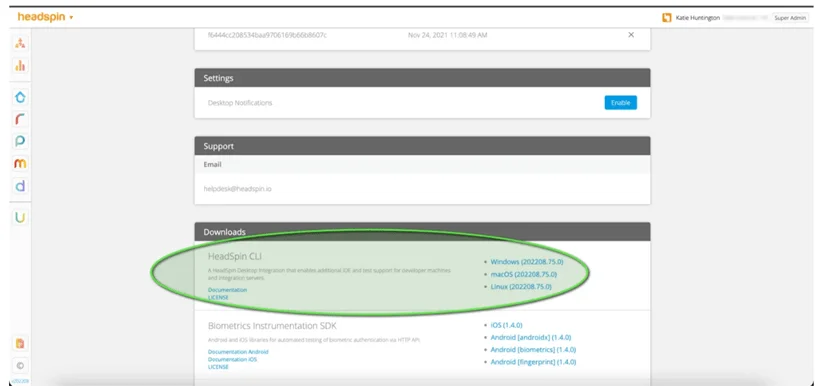
3. Downloading the CLI Tool: Scroll to the bottom of the Settings page, where you'll find the CLI tool link. Choose the suitable version for your OS (MAC, Linux, or Windows) and continue with the installation process.
4. Verifying Installation: After installation, confirm if you have the latest version of the CLI tool by typing "hs -V" in your terminal.
After installing the CLI tool, you can initiate the HS Tunnel.
5. Ensuring API Server Configuration: Ensure the API server is configured properly before using the tunnel. If you encounter an authorization error, try running the command provided below.
hs config server https://api-dev.headspin.io
Also read: Cookie Management Using HeadSpin's Cutting-Edge Remote Control Interface
Using the Tunnel Tool: Step-by-Step Instructions
1. Download the CLI: Make sure you have the CLI downloaded, as you'll need it to execute commands.
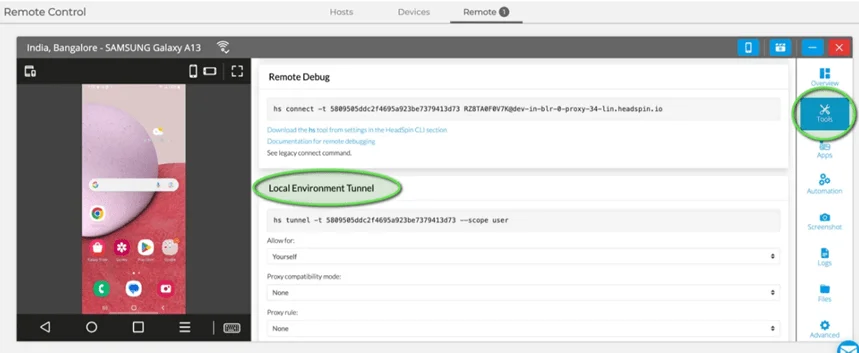
2. Select Device and Start Session: Choose a device from your organization's device list and begin a session on that device. Once the remote-control session starts, click the 'Tools' icon in the right-hand sidebar. Scroll down to find the Local Environment Tunnel box on the Remote-Control window's tools page.
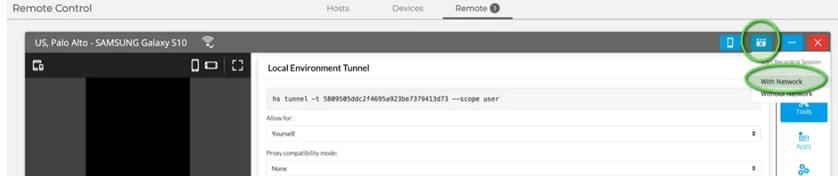
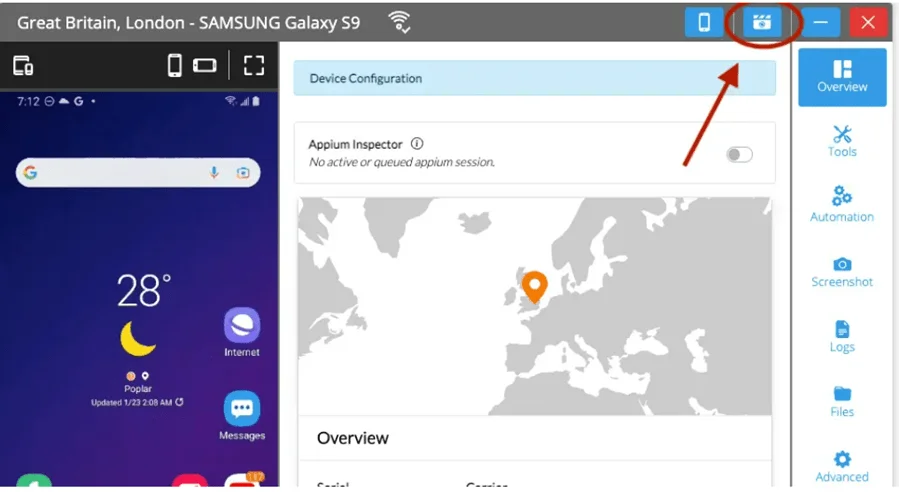
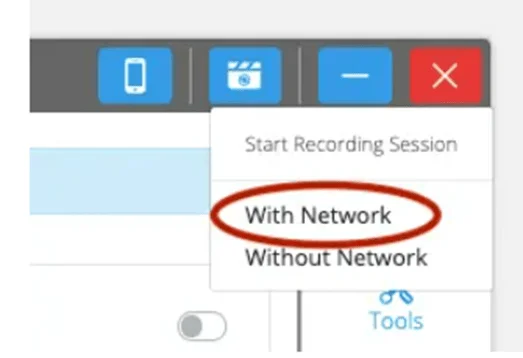
3.Activate Network Capture: In the upper-right corner of the Remote-Control window, click the second icon from the left, resembling a camera. A drop-down menu will appear with two recording options; choose 'With Network.' This activates network capture for your session, which is essential for the HS Tunnel tool. If you don't see this option, ensure your organization's permissions are correctly set by consulting your org and HeadSpin administrators.
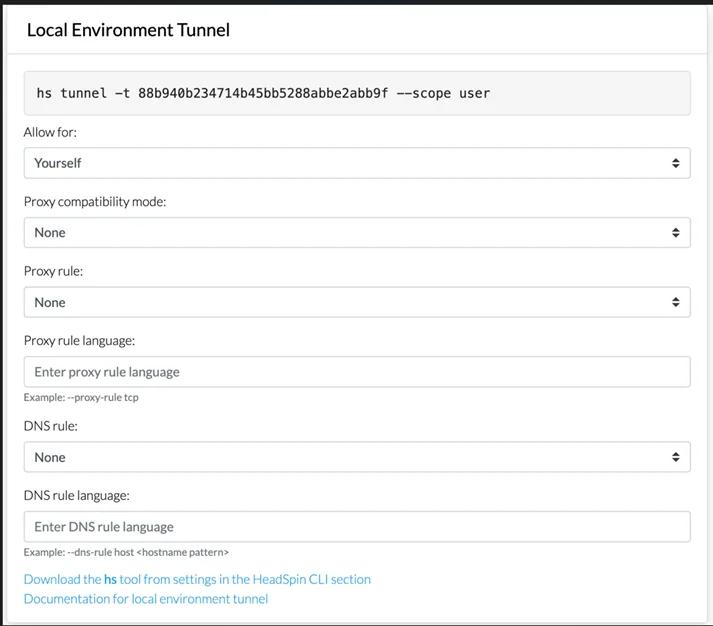
4. Configure Tunnel Options: Modify your tunnel's settings either through the drop-down selections in the Local Environment Tunnel box on the UI or by using API commands.
5. Check IP Addresses: Verify your device's and local machine's IP addresses. This verification ensures that your tunnel's configuration is applied correctly. You can find your IP address using online tools like whatismyipaddress.com.
6. Execute Tunnel Command: Copy the hs tunnel command from the Local Environment Tunnel box and paste it into your CLI. Run the command. Upon checking your device's IP address, it should now match your local machine's IP, rather than the device's geographic location.
Check: The HeadSpin AV Box - Unlocking the Future of Audio/Video Testing
Running the HS Tunnel
Executing the HS tunnel is a straightforward process. Follow these simple instructions:
1. Access Device Tools: Open your device and navigate to the Tools tab for Android devices or the Overview tab for iOS devices.
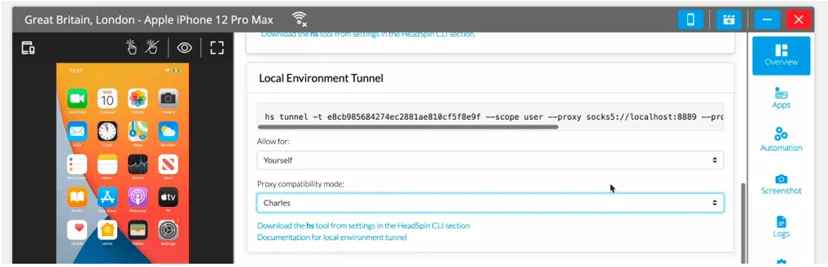
2. Set Tunnel Rules: Configure the rules and conditions in the "Local Environment Tunnel" section. This generates a command that can be executed via the command line.
3. Copy and Run Command: Copy the generated command and paste it into your terminal. Execute the command to initiate the tunnel.
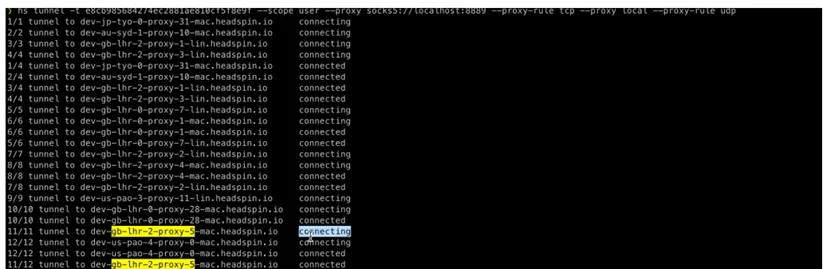
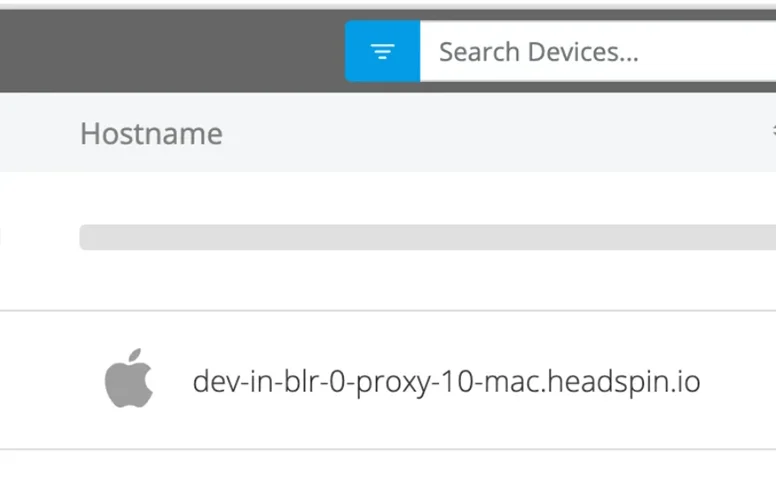
4. Verification: Confirm the connection of hosts by comparing the hosts displayed in the terminal with those listed in the UI. Each device's hostname can be found on the right side under the "Hostname" column.
Once all hosts are connected to your local machine, start the device you wish to connect to your local environment and click the capture button.
Upon clicking the capture button, you'll have two options: "With Network" and "Without Network." Choose "With Network" to connect your device and your local environment.
After completing these steps, verify the public IP address on the cloud device. It should display the IP address of your home or office network.
Bottom Line
In conclusion, the HS Tunnel feature by HeadSpin marks a significant leap forward in testing and development processes. With its seamless integration, users can effortlessly connect their devices to local networks, enabling efficient testing and debugging. The simple setup process, from downloading the CLI tool to executing tunnel commands, ensures accessibility for all users.
Moreover, HS Tunnel offers advanced functionalities like network shaping and configuration options, enhancing testing precision. While users must be mindful of compatibility with existing network environments, proactive collaboration with administrators can mitigate challenges. In essence, HS Tunnel empowers users to transcend geographical boundaries and streamline testing environments, fostering innovation in software development and user experience.
FAQs
Q1. What sets port forwarding apart from tunneling?
Ans: Port forwarding directs traffic from one port to another on the same or remote devices, while tunneling encapsulates data from one network protocol into another.
Q2. How do user tunnels differ from device tunnels?
Ans: Device tunnels connect to designated VPN servers before user logins, serving pre-login connectivity and device management needs. In contrast, user tunnels establish connections after user logins, enabling access to organizational resources via VPN servers.


-1280X720-Final-2.jpg)