Introduction
Occasionally I get asked “How does qTest Manager integrate with HeadSpin?”, especially from a manual testing perspective. This blog will discuss how to leverage these two industry-leading products together. I will not cover the qTest Manager mechanics of creating Projects, Releases, Test Suites, Test Cases, etc. My assumption is that everything is already created within qTest Manager, you just need to know how to execute your mobile test(s) on a HeadSpin device and track the results within qTest and leverage the additional features and benefits of the HeadSpin platform.
What is qTest Manager?
qTest Manager is a test management product from Tricentis. It allows you to organize your test cases and test steps, as well as easily track and manage test executions.
What Are The Benefits of Using qTest Manager?
qTest Manager from Tricentis has a number of test management benefits:
- Test at scale
- Test faster
- Leverage qTest Manager’s Jira integration
- Test management for enterprise DevOps
Question: Do I need to install anything special/specific for HeadSpin?
Answer: No, you don’t need to install anything specific to utilize HeadSpin devices. .
Why Would I Want to Use the HeadSpin Platform in conjunction with qTest Manager for Manual Testing?
There are a number of reasons why you would want to utilize the HeadSpin Platform for your manual mobile testing with qTest Manager:
- Diversity of available devices and locations around the world
- No limit on how many tests can run concurrently
- Utilize the comprehensive KPI data capture, including all network traffic to the device
- Use the Regression Intelligence feature of HeadSpin to conduct in-depth session analysis and comparison
- Ease of reporting with HeadSpin’s Dashboard capabilities
How Do I Execute a Manual Test using a HeadSpin device?
Let’s discuss how to execute a manual test using a HeadSpin device. As a reminder, this blog isn’t going to discuss how to set up qTest Manager or the creation of qTest Manager objects, such as test cases, etc.
In order to get started, open qTest Manager and select your Test Case. Then click on Run.
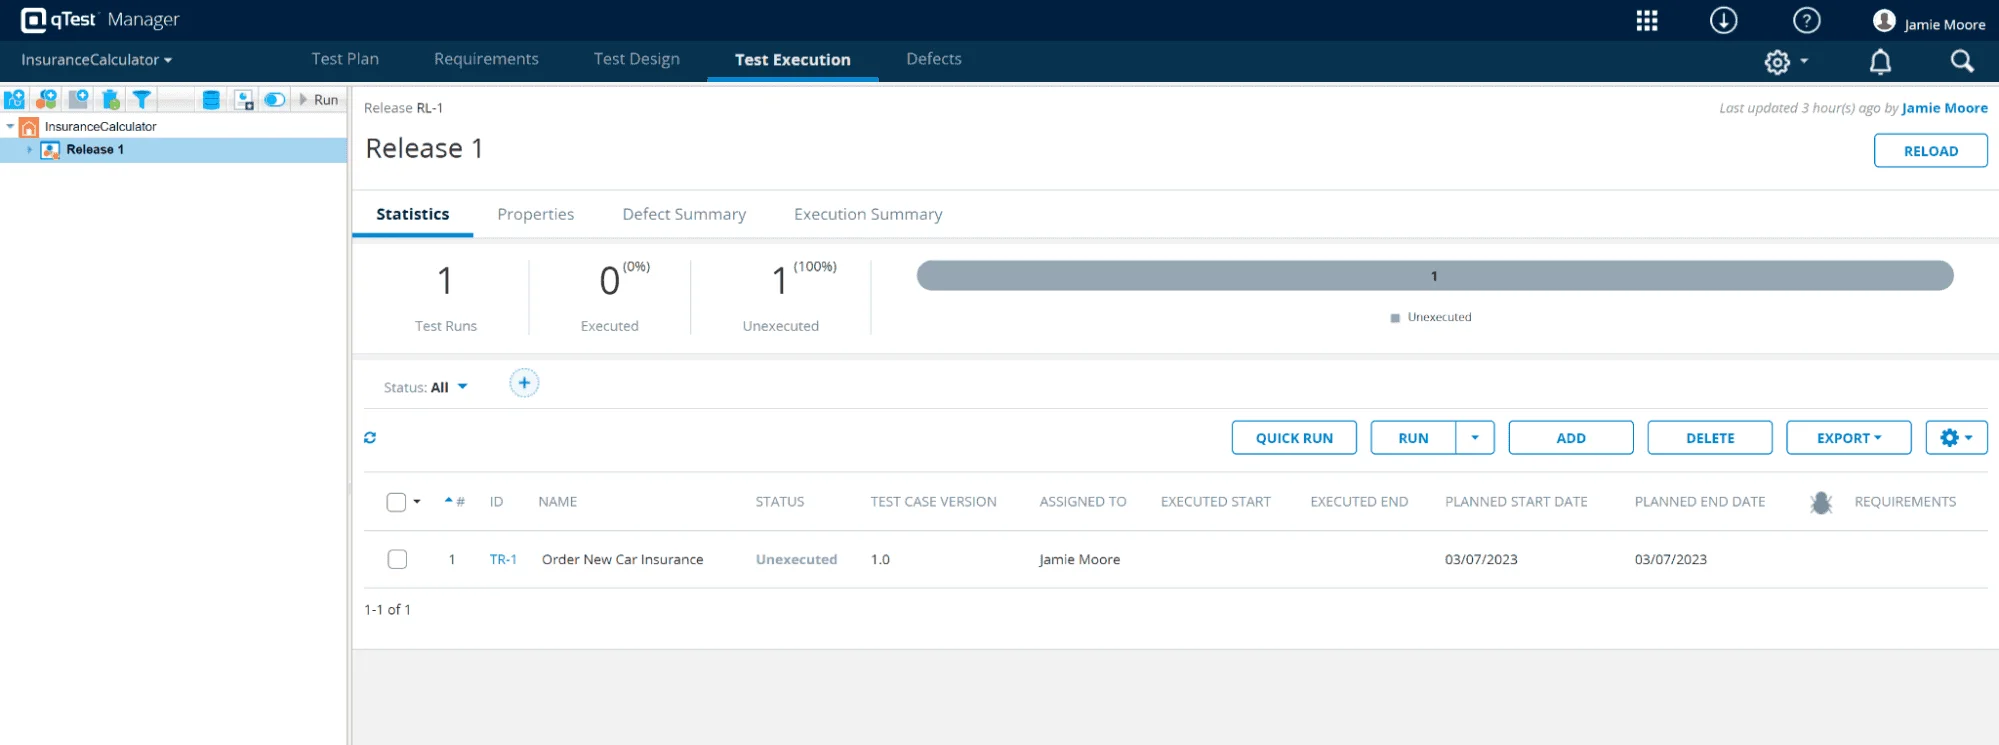
Click on Run:

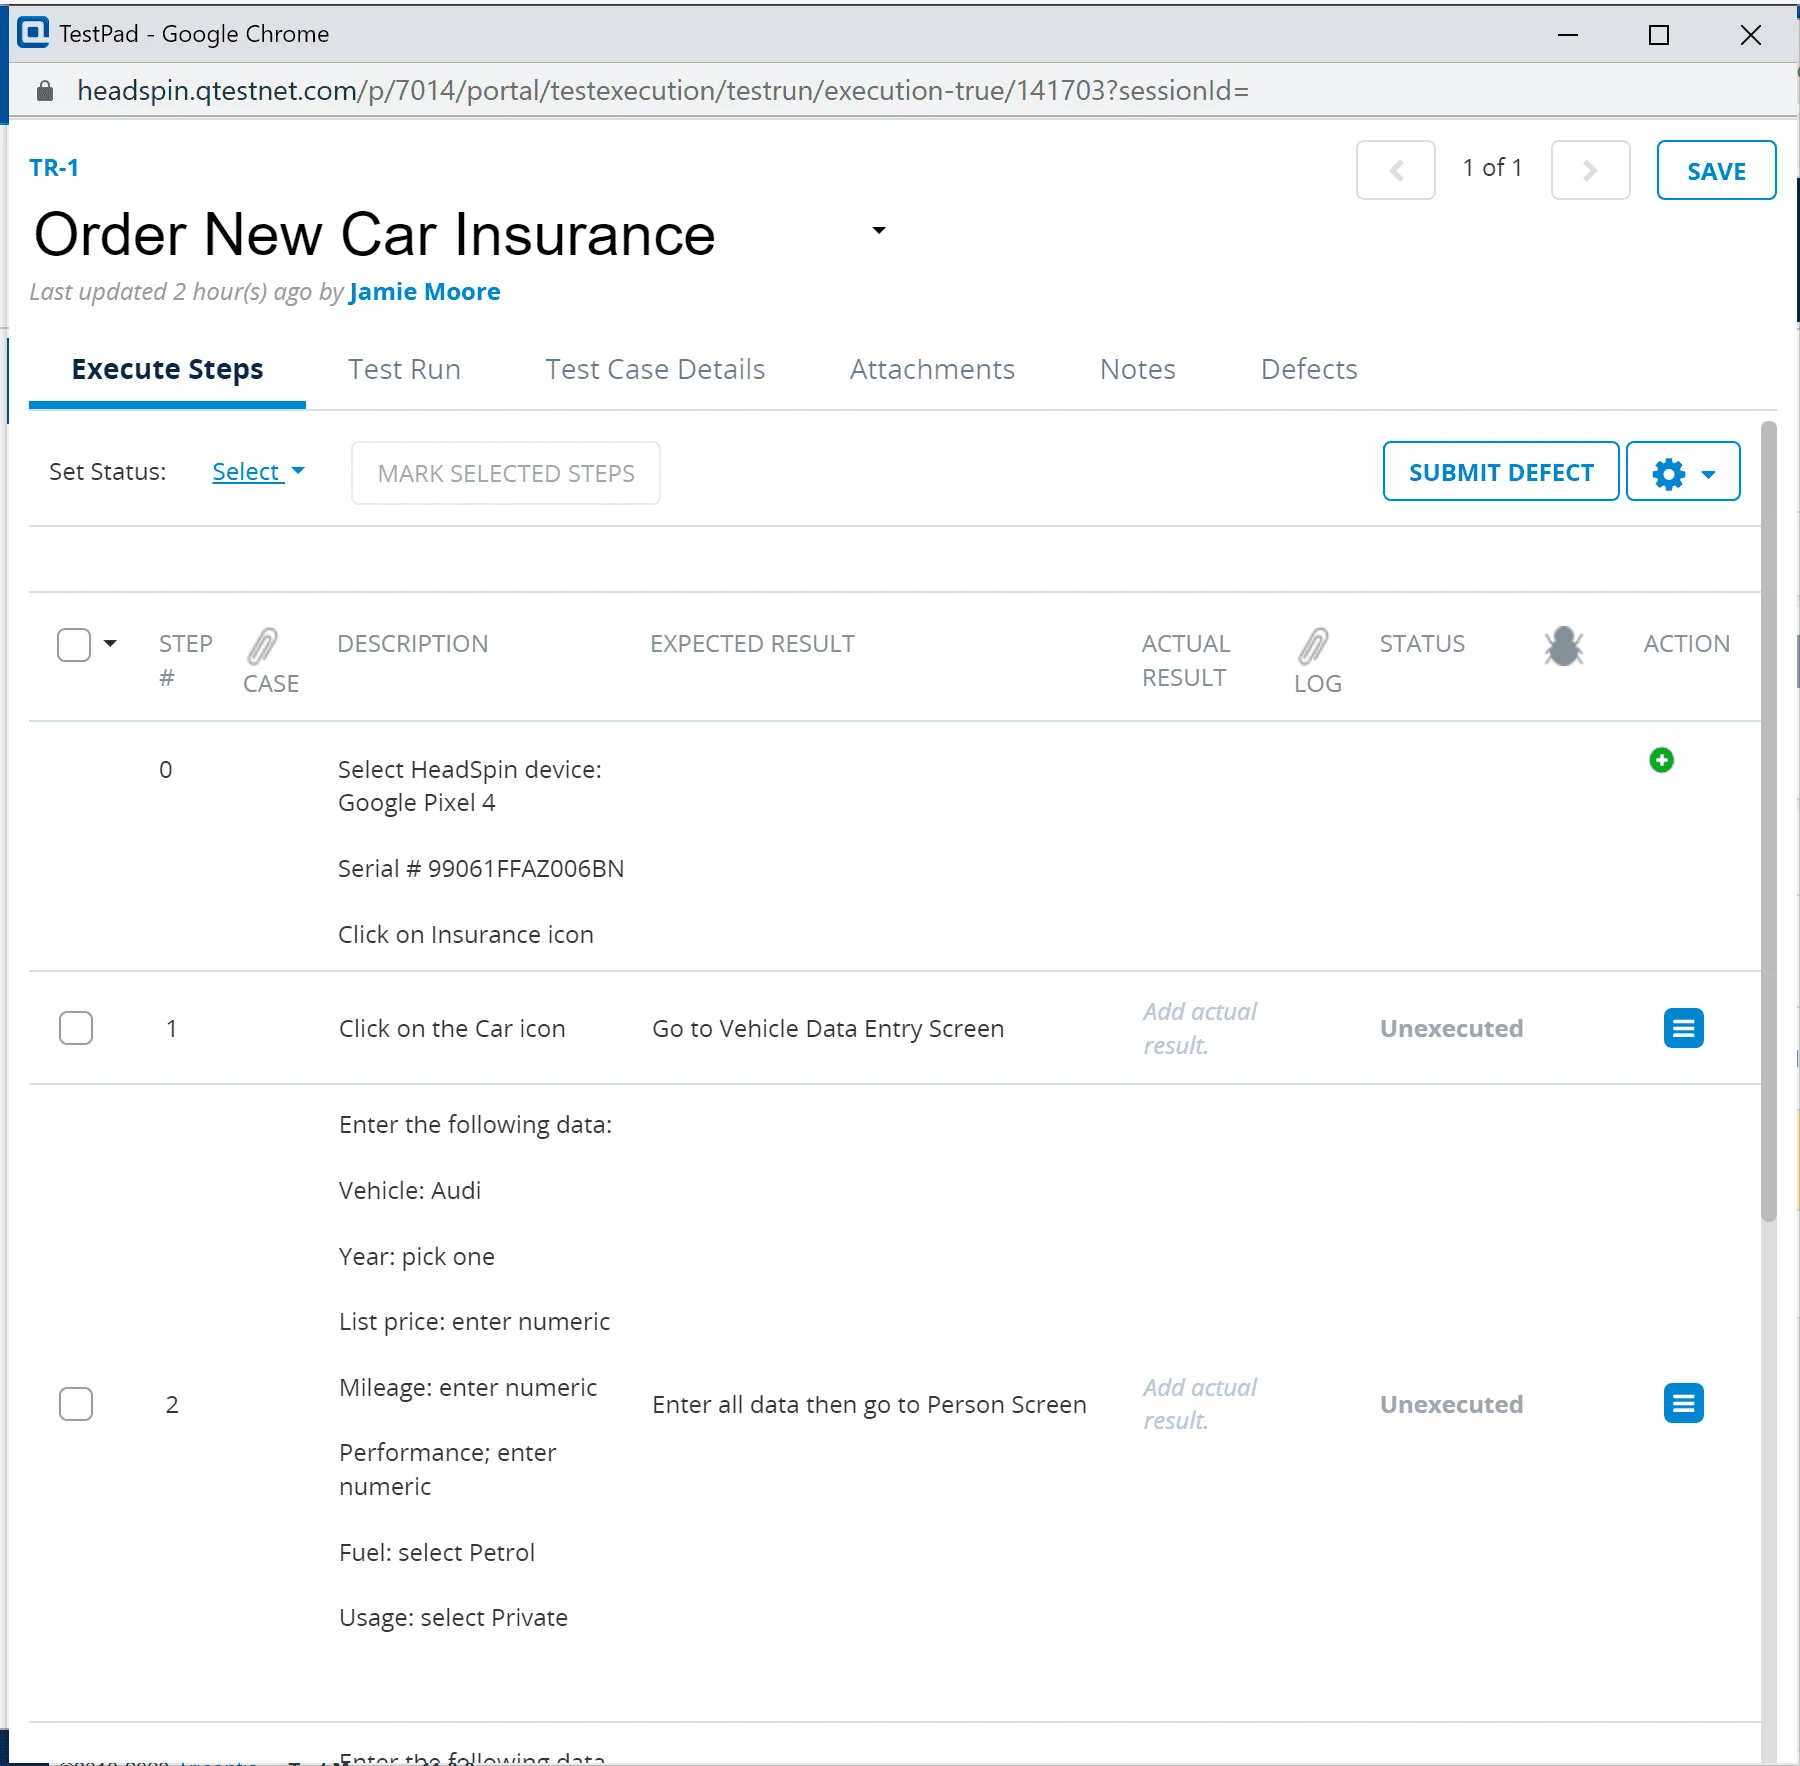
This will open the TestPad with the Test Steps of the Test Case.
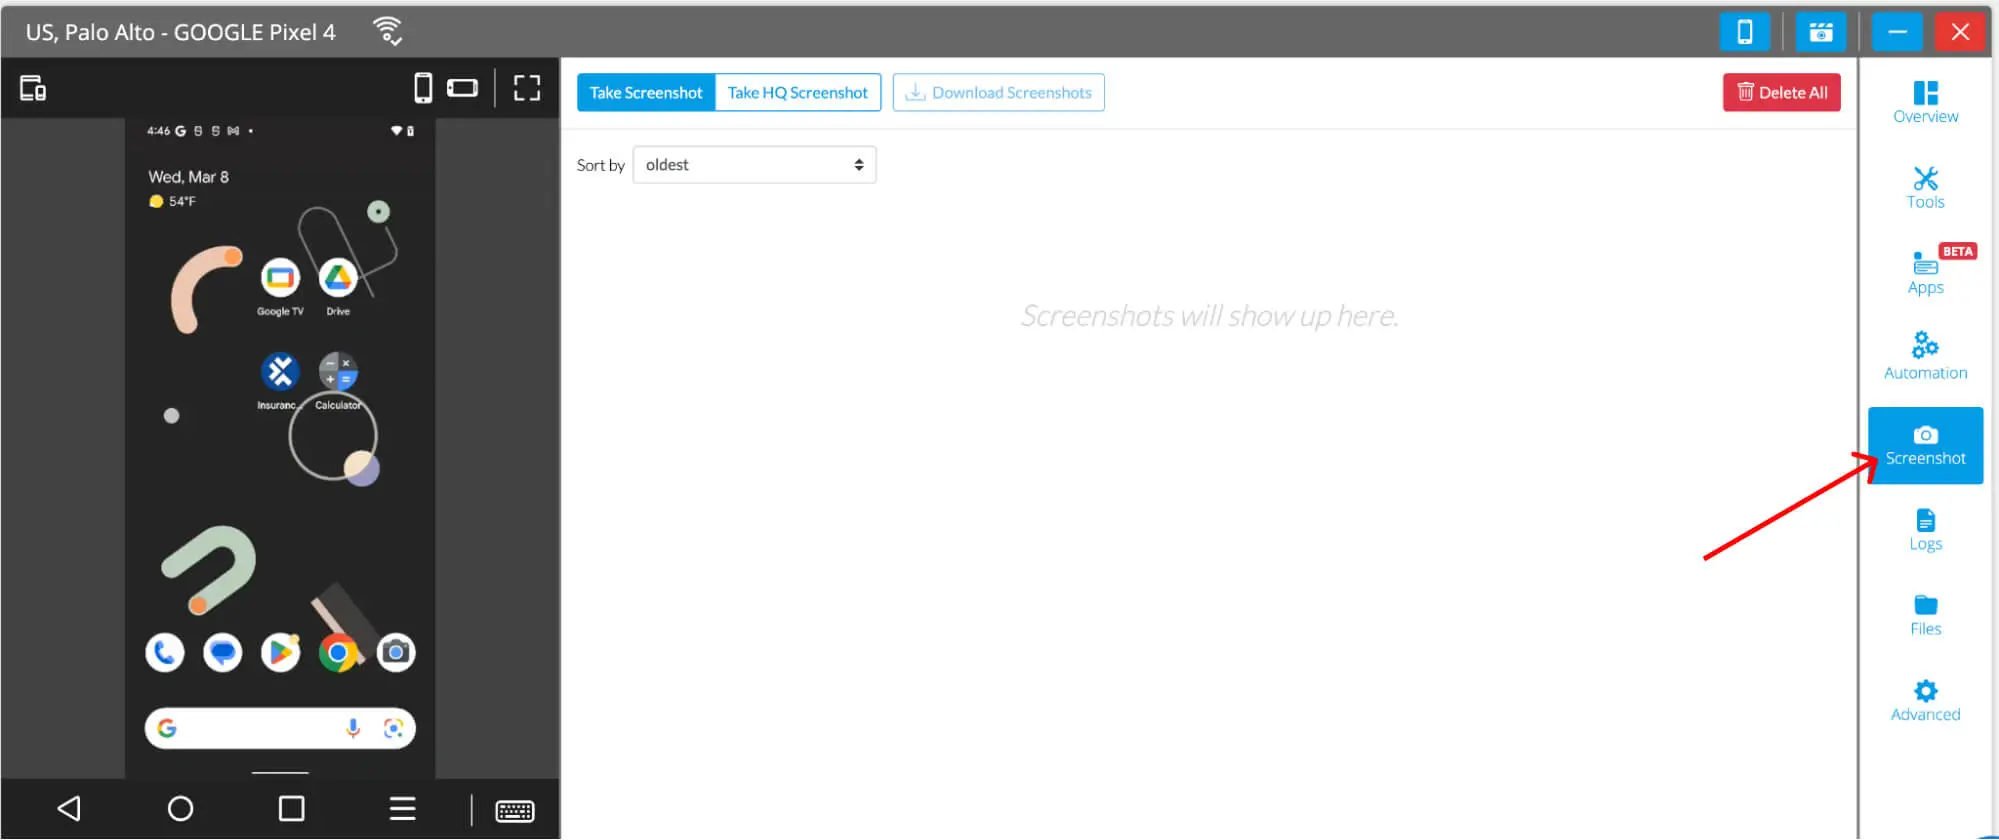
Now that the Test Case and Test Steps are ready for execution, you will need to start the appropriate HeadSpin device. Open the HeadSpin UI, find the device that you want to use, and click on the Start button.

If you want to take screenshots while you are conducting your test, click on the Screenshot icon.
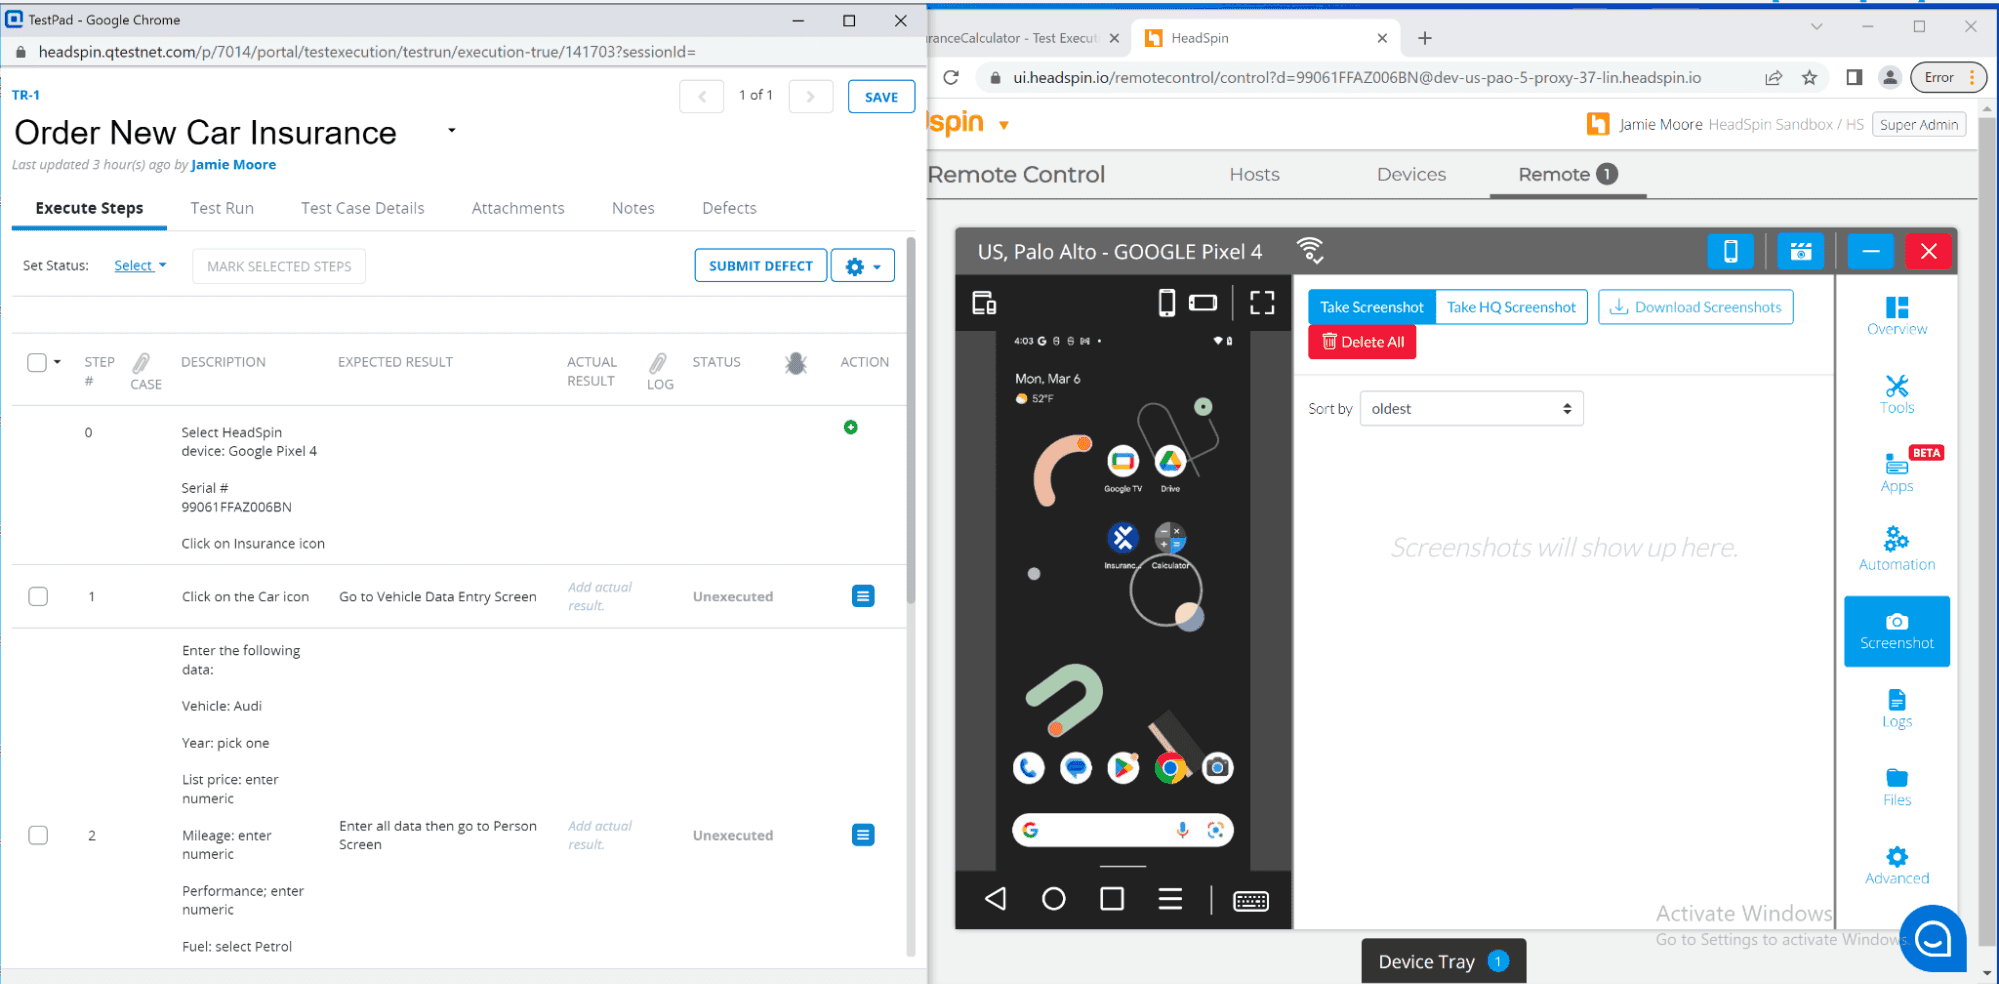
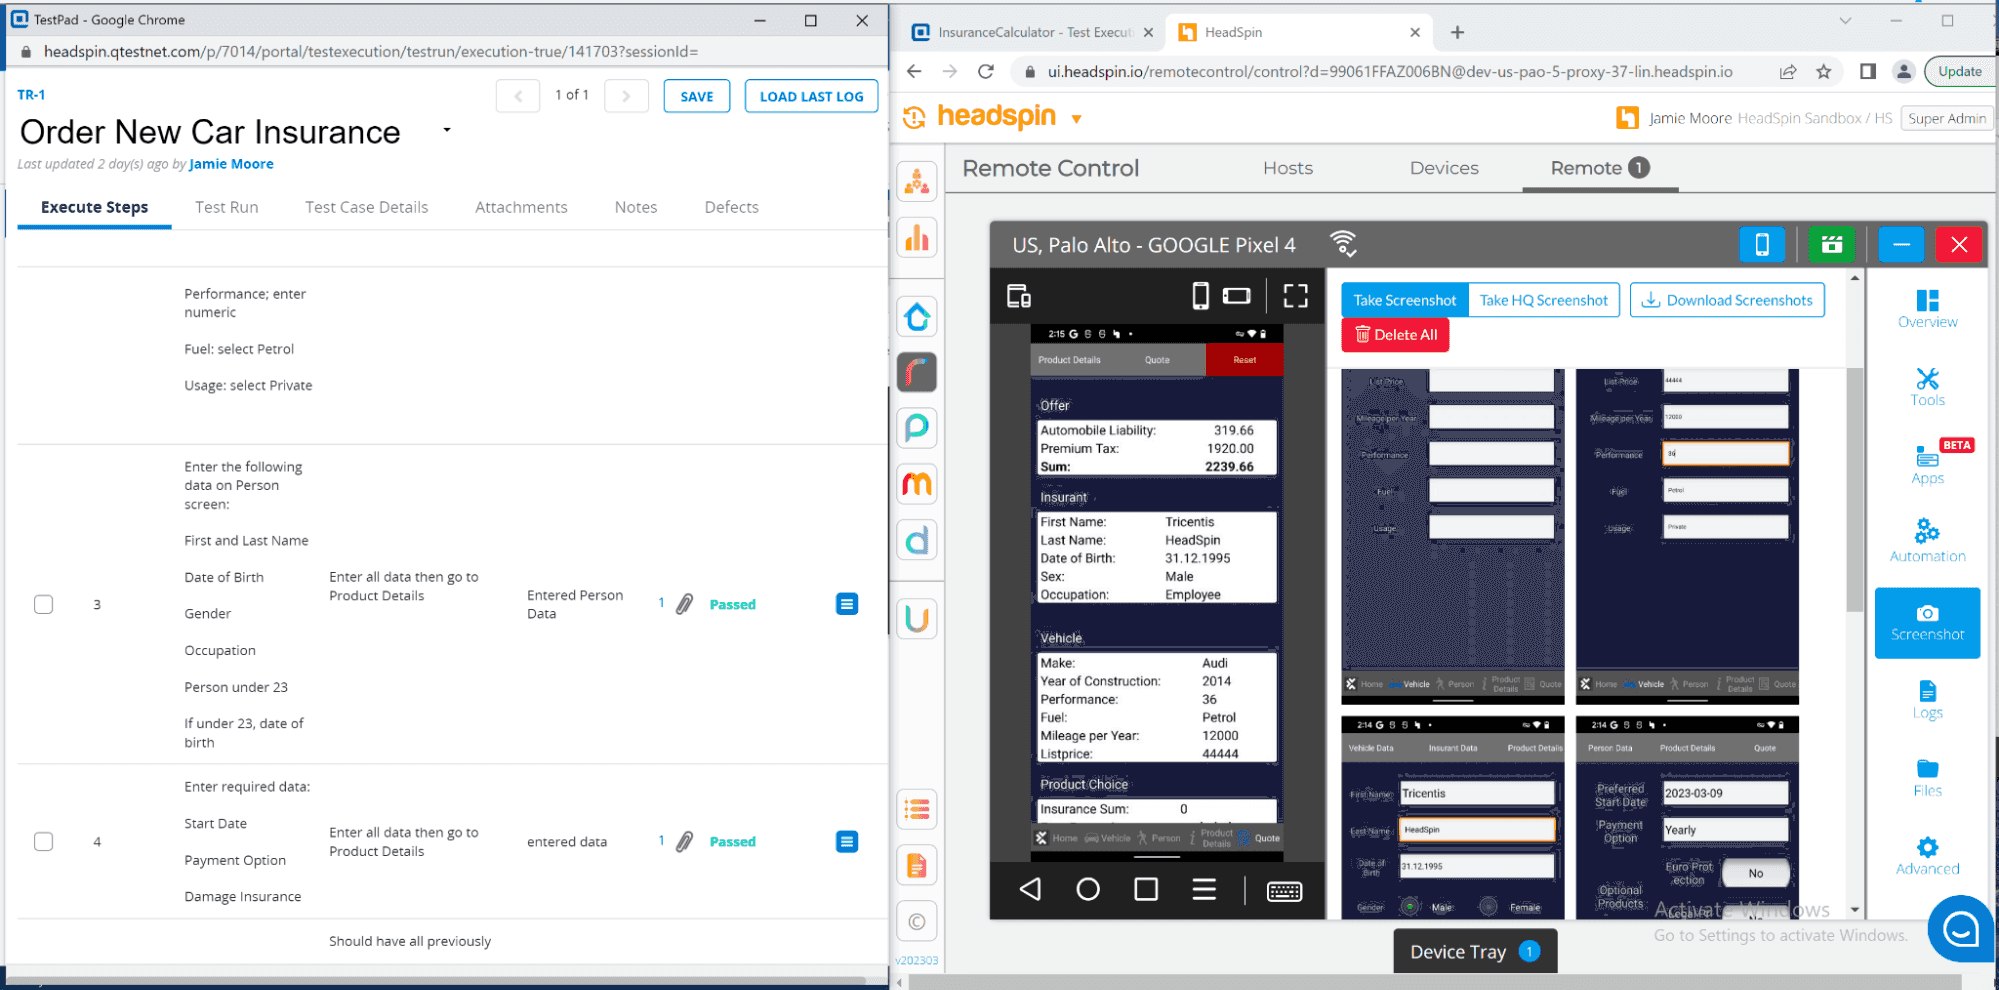
At this point, you have the qTest TestPad and the HeadSpin Device opened in two windows. You should resize the windows so that they display side-by-side. This will allow you to easily interact with each window as you conduct your test.
To capture your actions while executing your manual test in the HeadSpin platform, click on the Start Recording Session button and select With Network or Without Network, whichever you prefer. (Brief reminder: if you choose With Network, you will capture all of the network traffic during your test.)
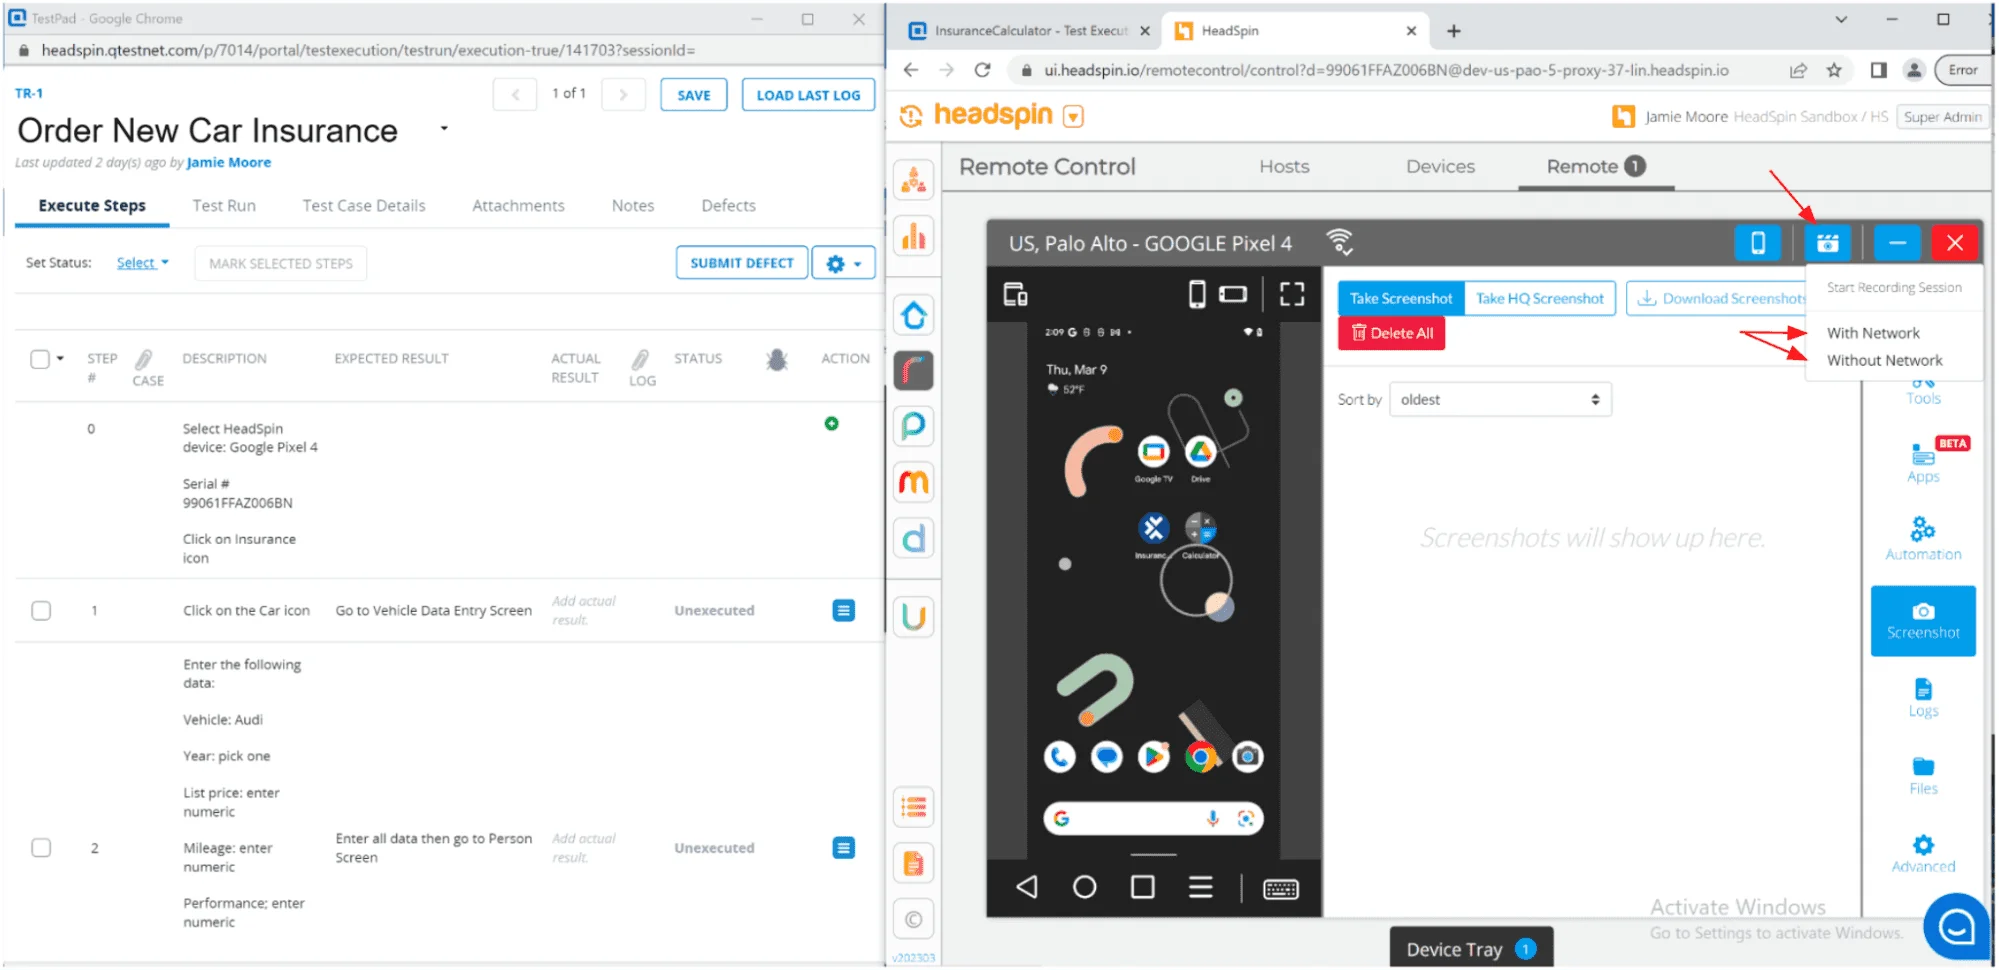
Then execute your test steps on the HeadSpin device. As you complete a test step, you can simply click on the Take Screenshot button in the HeadSpin UI to take a screenshot of what’s displayed on the device. (You have the option of selecting Take HQ Screenshot to take a high quality screenshot, if you desire.)

As you execute a test step, you can update the Actual Result field and set the Status of the test step. If you took a screenshot of the device, you can easily add that to the Test Log.
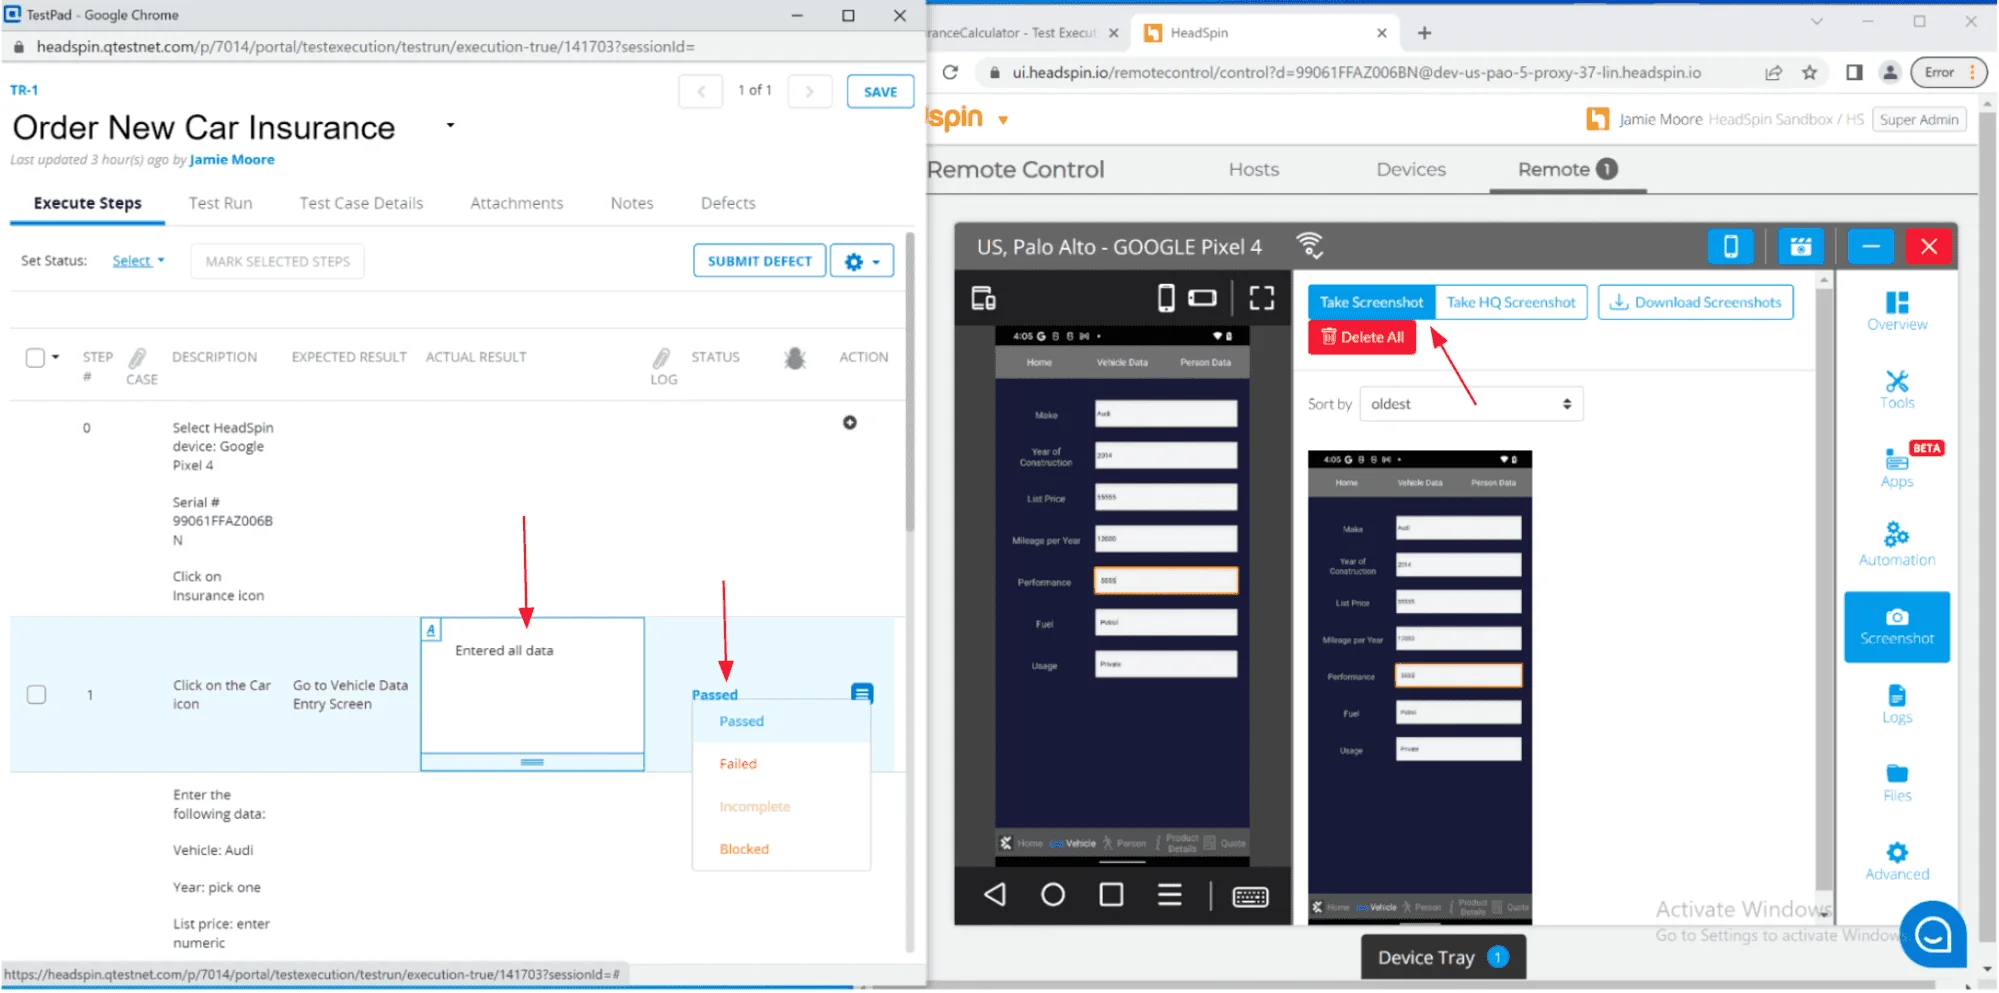
You will see the Attachments pop-up window. Simply drag and drop the screenshot on the Drag and drop file (Maximum Size: 50MB) box.

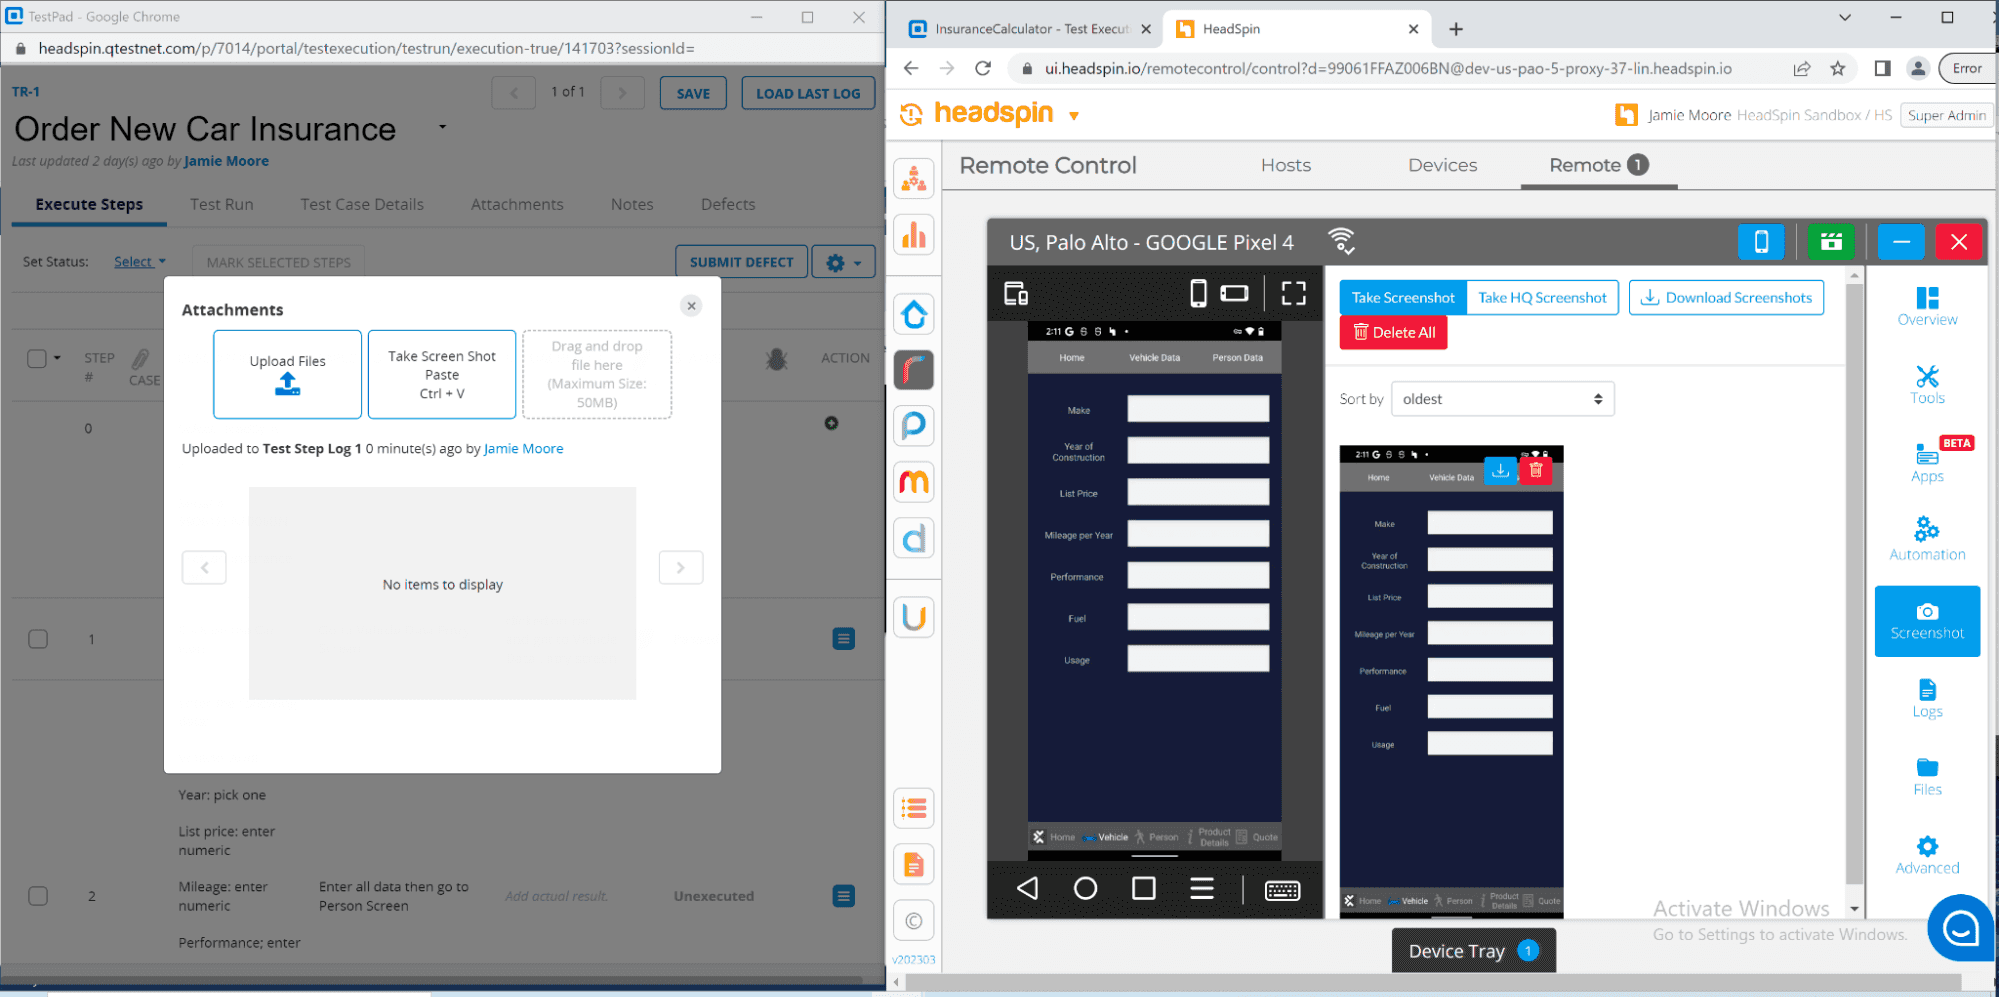
Once you have added the screenshot, close this window.
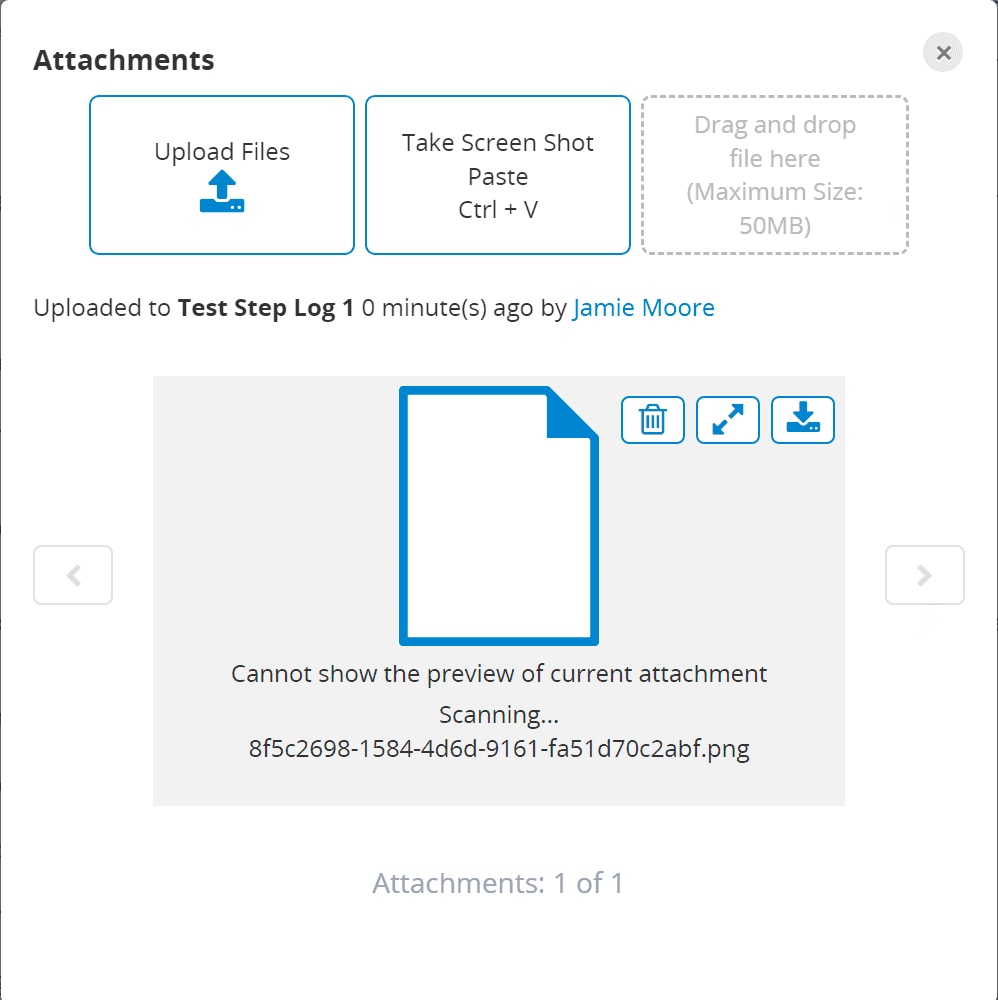
Continue in this manner to execute all of the test steps for the test case.

You will now be prompted to open the Performance Session that you have just created. To review the recording, click on either the Waterfall UI or Burst UI button. (You can also just close this window if you want to review the session later).

By clicking on one of these buttons, you will be able to see everything recorded by HeadSpin during the session.

By leveraging HeadSpin’s powerful performance session capture technology, you can get data on the device, network performance during the test, as well as a list of AI-identified issues.
But how do we get this data linked to the Test Log? For me, the easiest way is to copy the Waterfall UI (see below).

Next, paste this link in the Notes section of the Test Log.
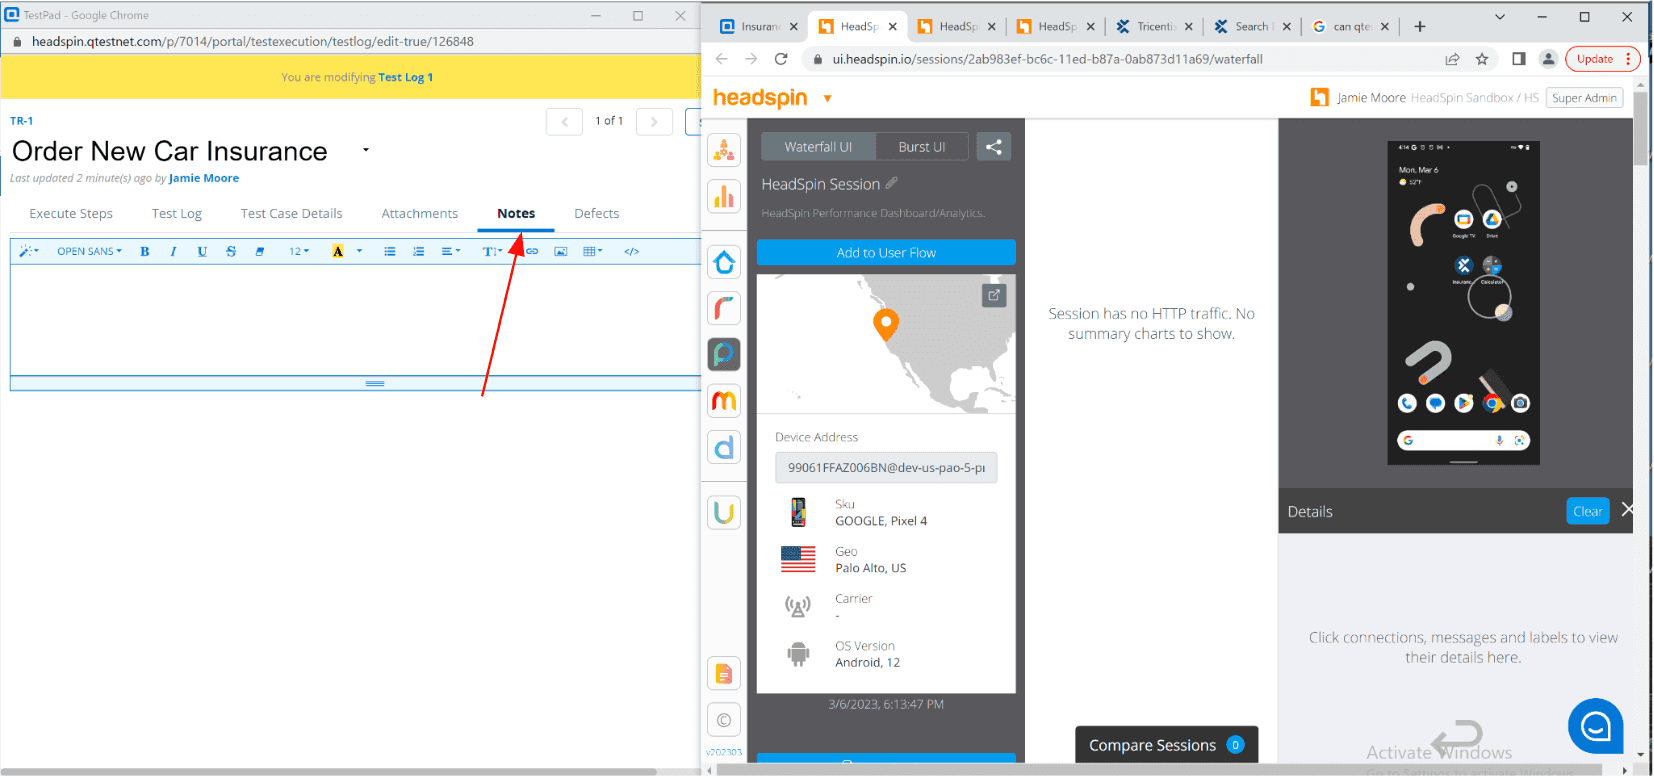

Now this Test Log will have the HeadSpin information readily available along with the test step actual results.
Complete Your Manual Test Run
Once you have completed all of your test steps, and added your HeadSpin Performance Session URL, you can complete your test run by selecting all of the test steps, mark their status and then Save your Test Log

What About Test Automation Tools?
qTest Manager supports other testing tools, particularly Tosca (by Tricentis). You can still leverage qTest Manager and HeadSpin together. See the blog on Tosca and HeadSpin here
Conclusion
You can easily do your manual mobile test executions using qTest Manager and the HeadSpin platform. This allows you to take advantage of two industry-leading technologies in the testing market: test management from qTest Manager and diverse device endpoints from HeadSpin.
Combining these two technologies will provide you with a world-class testing environment and will allow you to test faster with more comprehensive test coverage and in-depth analysis after the tests have been completed.


-1280X720-Final-2.jpg)


